When I started using Hugo, I was very impressed by its speed. But I was daunted by the directory structure it creates for a new project. With directory names like archetypes and static, a Hugo site felt unfamiliar and confusing. Fortunately, not every site needs them.
This post tells you how to start small with just the bare minimum files and directories to build a Hugo site without errors. Being minimal, this site will have only one page (essentially, the home page).
You can see the finished project on Github. Let’s start looking at only the top-level files of the project:
.
├── config.toml
├── content/
├── .git/
├── .gitignore
└── themes/
There are only two directories: content which contains your site’s content like posts or articles and themes which are contain various themes - the non-content part of your site like its design and page layouts.
For Hugo, config.toml contains all the configuration settings of your site like the name of the site, author name, theme etc. For this minimal site, we will only mention two lines:
baseURL = "http://example.org/"
theme = "bare"
This is a TOML file. It has a very simple syntax. Each line is written like this:
key = "value"
The baseURL value mentions the URL where the site will be published. Strictly speaking, we don’t need it for a minimal site. But Hugo throws an error if baseURL is not specified.
Next, we mention that we are using the “bare” theme. Essentially, “bare” is a directory inside “themes” directory. We will look at it closely soon.
The Git files are worth mentioning. I prefer to exclude the generated site (having rendered HTML pages) from Git. Assuming that the generated files will go into a directory named “public”, my .gitignore file is simply this:
public
Content files
A content file is usually a text file containing your blog post or article. Typically content files are written in Markdown syntax. But Hugo supports other text formats like Asciidoc, reStructuredText or Org-Mode, which gets converted to HTML. This is easier than directly editing HTML files.
The only content file in this minimal site is _index.md. This filename is special to Hugo and used to specify a page leading to a list of pages. Typically, an index file is used for a home page, a section, a taxonomy or a taxonomy terms listing.
Our _index.md looks like this:
+++
title = "Home sweet home"
+++

This page has **bold** and *italics* formatting.
The two +++ separators divides the document into two parts - the front matter (first three lines) in TOML format and the rest of the document in Markdown format. Front matter specifies the metadata of the file like its title, date or category. Most text editors will treat this file as a Markdown file (due to the .md extension) and ignore the front matter.
Since the _index.md is located inside content directory at the top-level, it will be the first page seen when the user opens the baseURL location i.e. the home page. However, for this page to be rendered, there must be a corresponding template within the theme.
Theme files
So far, we have not specified the look and feel of the site. This is typically mentioned in a separate theme directory (it can also be mentioned inside a layouts directory within the site but its more cleaner this way).
Unlike say Wordpress themes, you might not be able to download an arbitrary Hugo theme and apply it to your site. This is because a theme makes certain assumptions like that your site is a blog and the posts are one-level deep etc, which might not be true in your case. So, I prefer making my own theme while creating new kind of sites. Besides you would eventually want to customize your theme anyway.
The bare theme is located inside the themes directory. Here is directory structure of that theme:
themes/
└── bare/
    ├── layouts/
    │   └── index.html
    └── theme.toml
Note that this is literally a “bare” theme in that it has no stylesheets or images. It can just render a single home page in plain HTML.
The theme.toml like config.toml contains some metadata about this theme. As seen below, it is fairly self-explanatory:
name = "Bare"
license = "MIT"
The layouts directory contains templates which specify how your content files should be rendered into HTML. As you might have guessed, index.html at the top-level is used for rendering a top-level _index.md. This file contains:
<html>
  <body>
    <h1>Welcome!</h1>

    <h2>{{ .Title }}</h2>
    {{ .Content }}

  </body>
</html>
This looks like an HTML page except for parts enclosed in double curly braces ( {{ something }} ). These parts are in Go Template language and will be replaced by their values.
To understand what .Title means you have to understand that the dot in the beginning refers to the current context, which is the current page. In other programming languages this might be written as ThisPage.Title, but here ThisPage is implied and hence omitted.
The value for .Title comes from the front matter. While rendering “_index.md”, it will be replaced by “Home sweet home” (refer _index.md mentioned earlier). The value for .Content will be the rendered HTML from the Markdown file.
Most themes will have certain common elements across a site like a header and footer. Just because we only need a template for one page, the “bare” theme omits all those flourishes.
You can checkout the finished project at Github. You can use this as a landing page or could be a starting point to a larger Hugo project.
Rendering and Publishing
While developing a Hugo site or previewing a post that is being composed, you might want to use the built-in test server. The files are not generated (in the project folder) but you can browse your site locally in your browser
For local development, execute the following command (in the project directory):
$ hugo server -w
This is what you should see in your browser:
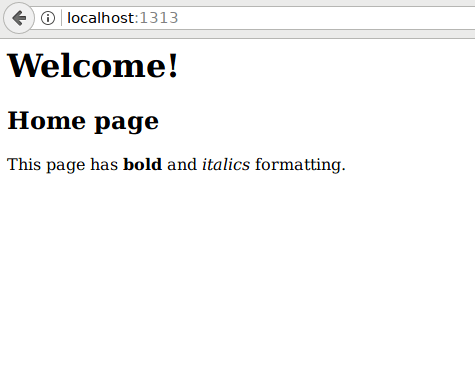
Once you are ready to publish the site, you’ll need the generate the files into an output directory. The following command will create generate your site into the “public” directory:
$ hugo --destination public
Now you can copy the files from public directory into the web root of “example.com” or whichever domain that you mentioned as your baseURL. You can use GitHub Pages to host this site for free. I would recommend reading up instructions in their GitHub Pages documentation.
Next, I would recommend looking at other Hugo sites to understand how various features of Hugo have been used. Personally, I wrote this post so that I have a minimal starting point when I start a new project. Enjoy exploring Hugo!