Reddit had a heated debate about the AJAX paging pattern. The debate sidetracked into the benefits of Paging. Nobody seemed to mention the excellent greasemonkey script Autopagerize which is proof that the concept works brilliantly. I find it one of the most indispensable Greasemonkey scripts available today.
The idea is simple. Assume you are reading a blog in blogspot.com. When you scroll towards the end of the blog, Autopagerize realizes that you are really interested in reading more blog posts. In other words, soon you would click on ‘Older Entries’ links. This would have caused a fresh page to load. How terribly annoying! Instead, Autopagerize will silently load the older posts in the background and seamlessly add them to the end of the page. By the time you finish reading the second page, the third page will be added to the end and so on and so forth. This results in a smooth and breezy browsing experience, which has to be experienced to be believed.
Installing Autopagerize
Autopagerize uses greasemonkey plugin and hence works only if you have Firefox installed. The steps are quite simple:
- Install Greasemonkey
- Go to Autopagerize script page and click on ‘Install this Script’ button
- Visit any of the supported sites e.g. stackoverflow.com or a blog like simblog
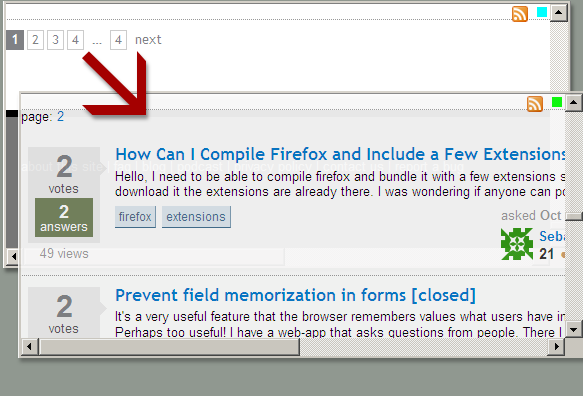
- If the page supports Autopagerize, a green square will appear at the top right of the page. Scroll to the end and it will momentarily turn blue to indicate that the next page is loading in the background.
How does Autopagerize work?
Autopagerize works on all kinds of sites which have pages. But how does it manage to understand the structure of them all? The answer is the community maintained SITEINFO database which is the result of hundreds of hours of effort.
Autopagerize is turned on for a particular site if its URL matches the url property. Once the page is loaded, it searches for the next link based on the xpath provided by nextLink property. The next page’s content is identified by the pageElement property. Anything which is not part of this content is discarded. This content is then appended to the existing page either by appending as a sibling to the existing pageElement or if insertBefore is defined, it is inserted before the element identified by insertBefore property.
How to Add any Website to Autopagerize?
Note: This is not for the faint of heart. It involves opening and working with some code (to the extend of editing some regular expressions).
So you would like extend the Autopagerize experience to more and more sites? Don’t worry, you have come to the right place. For this section you would need to install the excellent Firebug plugin. Firebug’s javascript console is the best interactive XPath debugger I am aware of.
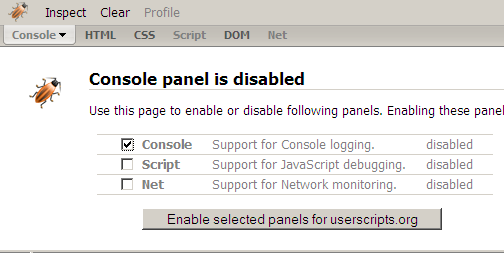
First, ensure that Firebug console is activated for your site. Visit the page you would like to Autopagerize say http://www.adobetutorialz.com/articles/2751/1/Professional-Web-Layout-for-Business-Solutions. Click on the firebug icon and enable the Console by checking the first check box (as shown in the figure). Click on Enable. Now the page gets refreshed and the Console appears.
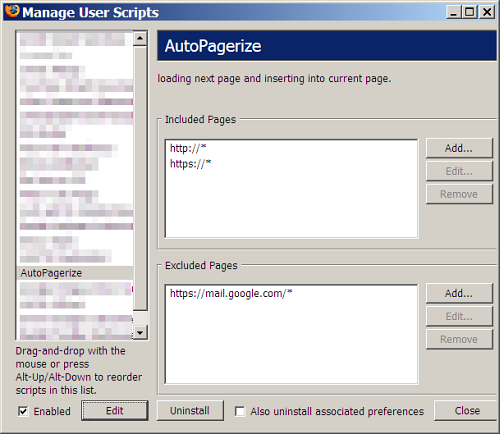
Next, go to the Firefox menu item: Tools -> Greasemonkey -> Manage User Scripts. Select Autopagerize from the list and click on Edit button below.
Turn on debugging by changing line 26 (could be different for you) to var DEBUG = 1. However I could make debugging work only after adding the following 3 lines further down, say after line 85.
if(unsafeWindow.console){
   var GM_log = unsafeWindow.console.log;
}
Scroll to the line that starts with var SITEINFO = [, which is around line 40. Copy and uncomment the 6 lines of sample code provided by the author as shown in the figure.
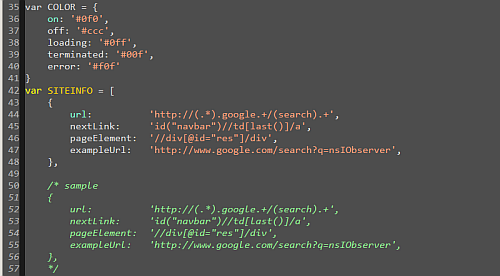
Now, give the appropriate XPATH values to the property variables “pageElement” and “nextLink”. The “url” variable is a simple regular expression and an example link for the fourth variable (this variable is purely for documentation). Save this file and refresh your page. If the XPATH values are correctly found the Autopagerize green square icon will appear on the page, else there will be some error on your Firebug console like:
nextLink not found
Debugging Autopagerize or Shit, Nothing Happens!
As you might have guessed, the last step I mentioned earlier is not so easy. This is where Firebug can help you. Before you start read some XPATH tutorials on the net to familiarize yourself with the XPATH syntax.
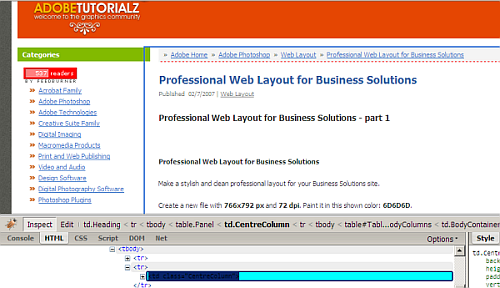
One killer feature in Firebug is selecting any element of a page and copying the XPath value of that element. On the Firebug window click on Firebug’s Inspect button and mousing over the page to outline that page element (see fig).
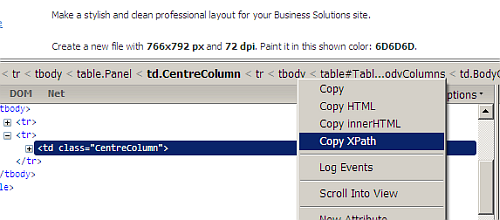
Click on the page element you are interested in and the details of the element appear on the firebug window. Right clicking on any item in the breadcrumb at the very top, you will see a Copy XPath option (see fig).
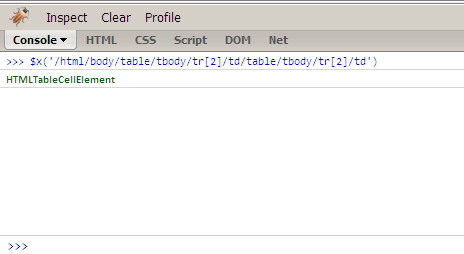
Now go to the console tab of Firebug and test the XPath by using the $x function. Paste the XPath as an argument to this function and you should get an HTMLElement as the result (see fig).
You will need to find variables: “pageElement” and “nextLink” this way. This is not an exact science and involves a lot of trial and error. Here are some tips I found after several hours of testing:
- Escaping - You will need to add a backslash ‘' before each special character like ‘/’ or “. This is not required in the Firebug console, however.
- Single Quotes - It is best to use single-quotes as the outer-most quotes in the Firebug console
- Firebug gives Absolute Paths - You will find that Firebug gives XPaths based on the position of a child element, which is likely to break even if the smallest change is made to the page. Try to avoid relying on positions.
- Use attributes - The best XPaths use the classname property or id property of an element or its parent.
- No Array Results - The XPath must always return a unique element. If an array of elements are returned, it will not work.
- Watch the Console - After you enable debugging the console provides useful error messages. This helps in identifying the problem.
- Read Examples - It is always best to check the huge SITEINFO database to understand how other users have tackled similar or tricky sites.
For the site we were using as an example, the following code should work:
{
  pageElement: "\/\/table[contains(@class,\"ViewArticlePanel\")]",
  url: "^http:\/\/www\\.adobetutorialz\\.com\/articles",
  nextLink: "\/\/div[@class=\"ArticleNavigation\"]\/a[contains(text(),\"Next »\")]",
  exampleUrl: "http://www.adobetutorialz.com/articles/2751/1/Professional-Web-Layout-for-Business-Solutions"
},
Hope this gives you enough information on Autopagerize and improves your browsing experience!