Python One-liner Games

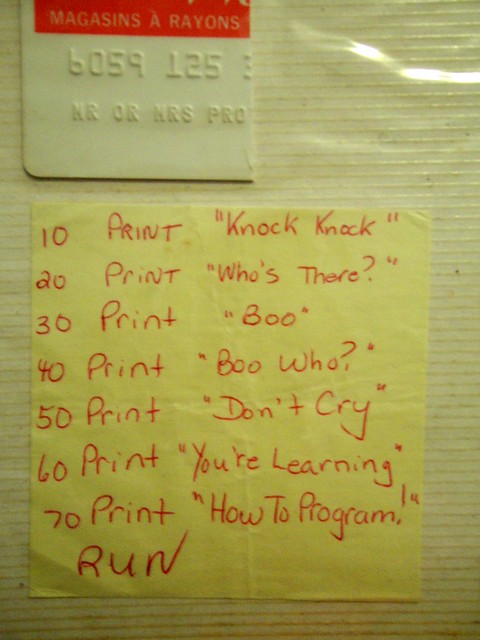
    I took a break from the intense book schedule this weekend (don’t worry everything is on schedule). Was reading about Commodore’s one-liner maze when it struck me.

    I wondered - why not make some one-liner games in Python? And just to make it insanely hard, I would try to make it fit a tweet i.e. 140 characters. Let’s see what we could manage.

    NOTE: All the one-liners below work only in Python 3. Depending on your platform, you might want to change the code by replacing python with python3.

    Maze

    Game recording

    python -c "while 1:import random;print(random.choice('|| __'), end='')" 
    

    Create an infinite maze with this deceptively short one-liner. It is quite easy to understand too. The while loop is infinite. The import statement had to move inside the loop but Python takes care not to re-import it each time.

    A random character is picked from one of the maze drawing characters and printed. An alternate version below has better maze drawing characters. But this version used characters which were displayable on the Windows shell (and possibly portable to other operating systems).

    Prettier Version

    python -c "while 1:import random;print(random.choice('╱╲'), end='')"
    

    This version uses two Unicode characters. The maze walls look more connected in this version and the viewing angle is interestingly skewed.

    If you are more interested in the history and phenomenon of these one-liner mazes, then I suggest you check out the book 10 PRINT, which can be freely downloaded.

    Crash!

    Game recording

    Crash is a homage to the BASIC era games like Lunar Lander. Watch an out-of-control spaceship fall into earth. You need to freeze time (i.e. Ctrl+Break) just before it hits the cliff walls.

    python -c "while 1:locals().setdefault('i',60);import time,random;print(' '*i+'<>'+' '*(80-i-1)+'|');time.sleep(.1);i+=random.randint(-2,2)"
    

    Once again, we rely on while to create an infinite loop. Since the whole code is wrapped in a loop, we cannot initialise the spaceship position i. Unless, of course, we setdefault the locals() dictionary directly.

    The print statement pads spaces i times to offset the ship’s symbolic representation. Then a slight delay is introduced for a convincing animation and the ship’s position is randomly shifted left or right. This put together gives the mesmerising effect of a swerving ship.

    Slot Machine

    Game recording

    Back when we were kids, we had a handheld toy slot machine with plastic rollers. We used to love spinning it until the three 7s aligned and everyone used to yell - Jackpot!

    python -c "import random;p=lambda:random.choice('7♪♫♣♠♦♥◄☼☽');[print('|'.join([p(),p(),p()]),end='\r') for i in range(8**5)]"
    

    This is one of the most fun games here. Essentially it needs three independent random number generators. Using a lambda function was the obvious choice for the generator so that you could invoke it thrice.

    I used a variety of fun-looking Unicode characters that rendered correctly even on a Windows shell. Using the \r (carriage return) terminator for print makes it overwrite the same line; giving the illusion of animation. Finally, 8**5 was chosen as a compact large number that completes looping in a reasonable time.

    Slightly Longer Version

    python -c "import random,time;p=lambda:random.choice('7♪♫♣♠♦♥◄☼☽');[print('[{}|{}|{}]'.format(p(),p(),p(),t=time.sleep(.1)),end='\r') for i in range(20)]"
    

    This version is slightly more satisfying since you can actually see the symbols as they change. The printed representation is also slightly better. However, these changes made it exceed the length of a tweet.

    100 Feet Golf

    Game recording

    Inspired by Pingu Throw (and possibly Angry Birds), this game allows you to choose the angle and velocity of a golf ball. The objective is to make it fall exactly in a hole at the hundredth feet, no more no less.

    python -c "import math as m;a,v=eval(input());[print('%03d'%x+' '*m.floor(0.5+x*m.tan(a)-x*x/(v*m.cos(a)))+'o') for x in range(102)]"
    

    Entering the two values is slightly clumsy due to the length restrictions. You need to input a tuple having two numbers like (0.9,120) - the first number is the angle in radians and the second number is the velocity (in some arbitrary unit). Due to the use of the infamous eval statement and subsequent tuple unpacking, input in any other form will not work.

    The remaining list comprehension is basically a for loop with a print function. The ‘height’ of the golf ball is calculated by a simplified form of the actual physics formula to compute projectile trajectories.

    The range is chosen to be slightly more than, the expected, 100 to give an idea of the trajectory in case you overshoot.

    Slightly Longer Version

    python -c "import math as m;a,v=m.radians(float(input())),float(input());[print('{:03}:'.format(x)+' '*m.floor(0.5+x*m.tan(a)-x*x/(v*m.cos(a)))+'o') for x in range(102)]"
    

    This version has a more sane method of entering values. The first input is the angle in degrees (thank god!) and the next input is the velocity. However, it exceeds the length of a tweet.

    Number Guess

    Game recording

    This is a classic game for new programmers. Rules are easy to understand - I am thinking of a number between 1 and 99. You can make a guess and I will tell if your guess is higher (‘H’) or lower (‘L’) than my number. You can make up to six guesses.

    python -c "import random;n=random.randint(1,99);[(lambda a:print('Y' if a==n else 'H' if a>n else 'L'))(int(input())) for i in range(6)]"
    

    Most of the techniques used here should look familiar - list comprehensions, lambdas and random integers. The lambda is needed since the input variable needs to be assigned (when the lamda gets called). The if else short form is used as a ternary operator.

    Upon a successful guess the game prints a ‘Y’. However, it doesn’t stop which is a possible drawback of this implementation.

    As you might know, the best strategy is a binary search. To make the game more interesting, I have chosen the maximum number of guesses to be one less than the ideal to span the range.

    How to Write One-liners in Python?

    One-liners are notoriously hard to write in Python. You would be hard pressed to find examples of one-liners with the exception of the Python wiki.

    What makes it so hard? Well, there are a couple of reasons:

    • Whitespace-significance: This makes is quite hard to include block statements like while or for. Often the entire program is wrapped in one loop statement.
    • Verboseness: Unlike languages like Perl there are no short hand symbols say for commandline arguments or regular expressions

    But Python is not devoid of merit for creating one-liners. Thanks to some great functional programming features it does have some advantages like:

    • Lamdas: Defining functions in a line does come handy despite its limitations.
    • List comprehensions: Readable yet terse constructs.
    • Reflectiveness: Ability to edits its own local variables for instance is quite handy.

    Overall, I am quite surprised by the kinds of games I could manage. My daughter and I had lots of fun playing and tweaking some of these games. They are probably the most fun I could get from one line of code.

    Comments →

    Edge v2.0 - More Edgy Ideas

    Edge v2.0 has just been announced. Since the first release, there have been numerous feature requests and pull requests. I am happy to share that we have been able to incorporate most of the planned features and fixes, including:

    • Email-based logins!: Most websites don’t need usernames. Furthermore, the users have to come up with a unique and memorable username. But their email address is already unique and memorable, hence more widely used for logins these days.

    • User profiles!: In 90% of the user based applications you will need to create a user profile. So we have added one with nice default fields like a user avatar image, bio etc. They are extendable too.

    • Python 2.7 support!: Supporting Python 2.7 was a much requested change. Back-porting needed not just syntactic changes but some tricky Unicode management as well.

    • Less Bootstrappish: After browsing through several examples of well designed bootstrap-based sites, several design improvements have been added like see-through navbar that changes on scroll, full cover image etc.

    • Environment specific Settings and Requirements files: This was a convention most Django developers follow so the environment specific files have been split out.

    • Authentication Workflows: In addition to signup, login and logout; we now have views to change password, reset password etc. They are class-based views, hence easier to extend.

    • Lots more: check the wiki for details.

    Most of these features are implemented by integrating several wonderful Django projects like authtools, crispy forms, admin-bootstrapped etc. Due credits to their wonderful work which makes Edge possible.

    Checkout this brief screencast demo of these new features.

    Screencast

    As always, please raise any issues and pull requests at the Github page.

    Installation instructions: https://github.com/arocks/edge/wiki#quick-start

    Comments →

    Django Design Patterns and Best Practices Book - Coming Soon

    Here is the big news I hinted at in my last Pycon talk. I have been working on a book titled “Django Design Patterns and Best Practices”. Most of the early drafts have been reviewed and it is slated for publishing in March.

    You can pre-order it here right now! Click here if you like to be notified when it will be published.

    Some of the highlights of this book:

    • Guides advanced beginners to web application fundamentals and patterns
    • Updated for Django 1.7 (upcoming 1.8 features also mentioned)
    • Covers the creation of a fun project - a social network for superheroes
    • Uses engaging story elements to illustrate real world challenges
    • A short read at less than 200 pages

    Why Patterns?

    Most Python programmers I know, rarely use a Gang of Four pattern like the Strategy Pattern or the Iterator Pattern. It makes sense, too. After all, they were designed for object-oriented programming languages like C++ and Smalltalk, while Python has better higher-order abstractions. Many of these patterns are not even required in Python.

    But while working in Django, we come across patterns at a higher level of abstraction. They could be anything from implementing models to store user profile details or inserting the same set of context variables to multiple views.

    When faced with tough deadlines, we might code away until we get a feature working (Coding vs Programming?). But what if we are – as Django’s tagline says – Perfectionists with deadlines? Wouldn’t you prefer a cleaner solution over a kludgy one that just works? Do you see a set of problems enough number of times to expect a generally acceptable solution?

    Code

    My definition of a Django design pattern is quite broad. It could be any design problem that occurs frequently while working in Django. It could have a confusingly large number of solutions. A pattern will try to illustrate the cleanest solution that can be applied every time the problem occurs.

    Best Practices

    The creators of Django have beautifully documented many of their design principles like – Don’t Repeat Yourself (DRY), Loose Coupling, Tight Cohesion etc. They help us write better and more idiomatic Django applications. They also guide us in choosing a better design pattern among many alternative approaches.

    However, there is a lot of undocumented wisdom that is considered best practice. There is no right or wrong way to design a URL scheme for a website, Django is quite flexible to support even the most esoteric schemes, but there are definitely best practices.

    Making high quality Django applications requires you to be constantly updated with current best practices. Every time a release of Django brings a major change like database migrations or custom user models we need to reassess our practices. This book will hopefully be a guide to the latest Django and Python best practices.

    Who is it for?

    As a speaker, I have met numerous people who would like to learn more about Django. I am constantly amazed by the varied backgrounds they come from. Be it a teacher in Philippines or a stock trader in New Jersey, many are learning Django to build that dream web application.

    rupauk's scrapbook ~ programming notes

    Many get stuck after learning the brilliant polls tutorial. They are overwhelmed by the number of topics they need to know. Most books expect you to know Database theory, Information architecture, Web design etc. Most people just need to know the essentials and, preferably, in a smaller form.

    I hope this book will be useful for beginners and experienced Django developers alike. There should be a focus on fundamentals even for an advanced book. Because you can always build on fundamentals. By the end of the book, you should become a more efficient and pragmatic web developer.

    Help a Charity

    At the time of conceptualizing the book, I had considered releasing it open source. However, it seemed much more meaningful to donate a part of the book’s royalty to charity. That way, it would not only sustain the writer (and his family) but later would be a powerful motivator to complete the book itself.

    my first lesson on friendship!! [Explored 08-11-2011 #75]

    I would be donating half of all royalties from this book to recognized charities like Swanthana who focus on children with special needs. So when you buy this book, you know that you would have made a positive impact on a child’s life.

    Postscript

    In the next few days I plan to keep you posted on the updates about the book. In the past few months, I have learnt a lot about writing. It is not unlike programming except that the language is a lot more trickier ;) .

    Hope to share more details about the writing process soon. There is a lot of excitement coming your way!

    Comments →

    Introducing Edge - a Modern Django Project Template

    A newer version has been announced

    Have you ever begun creating a web app only to abandon it while setting it up? I have done it more times than I would have liked.

    Many programming environments involve so much ritual to setup that we tend to forget what we set out to create. Recently, I had to setup an Android development environment from scratch. Despite downloading the latest version of the IDE, I waited until several additional updates downloaded to patch it to the latest version. The trend of packages getting more granular and updates being made several times a day is here to stay.

    It is like if you have an idea for a painting then you have to go shopping for all the art-supplies first. But the moment you step out, you have lost your muse. Scientists call this encoding specificity or as a famous paper calls it “Walking through doorways causes forgetting.”

    Django Projects

    Of course, in Django I use startproject which builds an excellent but minimal project structure. But once I start coding I inevitably tend to install packages like the django braces. Most of my project use Bootstrap, so I end up downloading the bootstrap assets as well. Any non-trivial web app needs some login functionality, so I end up adding that too.

    In short, by the time I have setup everything to actually start building the app, I have crossed the doorway and forgotten most of the idea. And lost a bit of the enthusiasm too. Edge - for Django Projects in 2014

    So, I created Edge. I believe Edge is a great starting point for Django projects. It comes with Bootstrap assets (even for the admin), basic user sign up flows and a sensible set of default settings. Most importantly, it is built for Django 1.7 and Python 3.4, the latest versions at the time of writing.

    As soon as you start your project in edge, you will notice that it has a great looking and functional home page rather than Django’s familiar blue “It Worked!” page. The appearance is much closer to what you expect as a starting point for your app. Check it out yourself in the short demo below.

    Edge demo video

    Motivations

    Things I found missing or inadequate with the default Django project structure

    Iconic Omissions

    It started with the small things. Doesn’t it always? Every time I noticed a 404 while developing a Django application I had to calm myself down - don’t worry, it is just a missing favicon.

    Missing Favicon

    I know I would eventually add a favicon in production. But I kind of turned blind to errors on my test server logs. The fix was to add a favicon, of course.

    Template and Static paths

    Another one of those small things that I would always need to specify to my settings.py. I understand why the paths are not there. But during developing, it would be so much more convenient, if these directories were present and added to settings.

    Pathlib

    Talking about paths, the awkward os.path.join(BASE_DIR, “templates”) call is needed anymore. Edge uses the new pathlib library in Python 3.4 instead. The new syntax BASE_DIR / “templates” is much more convenient and readable.

    Bootstrap

    It is 2014 and hardly anybody starts with a blank page (I mean, blank HTML and CSS) anymore. In fact, most people I know start with a minimal Bootstrap 3 template.

    There are many good packages for using bootstrap in Django. But edge doesn’t use any of them because it is becomes another dependency that sometimes lags behind the rapid development cycle of Bootstrap. Instead, bootstrap assets have been directly included in the static folder. Updating is now easier, just copy the latest versions into the appropriate paths.

    User Authentication

    Django has a built-in user model. It is the base for the admin interface and countless other packages. But a simple user sign-up, login and logout workflow needs quite a bit of work to setup.

    Django registrations was often used for this but has been inactive for a while. Even though Django allauth is an excellent solution in production, I would hardly use social login in my development environment.

    In edge, a simple sign-up and login form has been provided using crispy forms and class based generic views. It does not do email verification or need a dummy mail server setup. But it helps you prototype and build web apps that can be shown to users for early testing.

    Admin

    “What is this Django Administration?” If only I had a nickel every time someone asked me this. Most projects continue to have their admin interface titled that way even in production.

    The admin interface’s appearance also looks quite antiquated. Try opening it on a mobile device. The edge template uses django-admin-bootstrapped to give it a Bootstrap 3 theme. Also, it customises the heading to “MyProject Administration”.

    Alternate Project Templates

    There are many good project templates already available. I did try using django-twoscoops-project, django-base-template, django-project-skel etc. Some of them did not work properly in Python 3. Others seemed too bloated.

    Project templates are a subjective choice. While I prefer a template with all the necessary settings to start focusing on the problem at hand, I find packages like Celery in the bells and whistles category. Using a project template generator like cookiecutter was also something I never preferred.

    My solution - edge

    Edge has everything what I expect to be in a Django 1.7 and Python 3.4 project. I have used edge in a couple of projects and look forward to using it in my future projects. It is my new baseline.

    More details about the features and future plans are on the wiki. The project itself is open source and on Github.

    I would love to hear your feedback.

    Comments →

    Recreating the "Building a Blog in Django" Screencast

    Few days back, Django 1.7 release candidate 1 was announced. I have never been so excited about a release in recent memory. It has a new app loading framework and schema migrations baked right in!

    It is also the significant release that I had been waiting for to update my original Django screencast. With more than 77 thousand views, it is by far the most popular Django screencast on YouTube.

    Back in 2012, when I was working in Django, there were a lot of comparisons between Rails and Django. One of the biggest selling points of Ruby on Rails was their official 15-minute blog screencast. It was fascinating to watch an expert Rails developer build an entire site from scratch especially how deftly they use TextMate, which could nearly read his mind.

    Armed with a Linux terminal and Emacs, I set out to create a similar screencast for anyone interested in Django. Live coding was something that I had not tried before. I remember starting at 11 pm one night, hoping to complete my recording by midnight.

    But by the time I finished a recording without any major goofups it was 5 am in the morning. So with barely any editing, I directly uploaded the raw footage to YouTube and hit the bed.

    Over time, a lot of people have loved the screencast, often asking how they can setup their development environment to resemble mine. Emacs despite not being an IDE is often as productive or more, depending on how well you customise it.

    Why the Remake?

    I have done several more Django screencasts after that, preferring to demonstrate entire projects in Django rather than focus on a specific feature. But the original still remains a favourite as it is beginner-friendly and short.

    Plenty of new cool features like Class-based Views had come to Django since then. I also noted that there were very few tutorials which used Python 3. For starting a new Django project, I would definitely recommend Python 3.

    So, I decided to remake it but even shorter. Crazily enough, I wanted to cover a lot more than the first screencast. Here are the topics I wanted to touch upon (ones which were not covered in the first screencast are in bold):

    • New 1.7 defaults
    • Syntax changes in Python 3.4
    • QuerySets and Custom Managers
    • Admin and ModelAdmin
    • Rich-text posts with django-markdown
    • Generic Class-based Views
    • Tags
    • RSS Feeds
    • Migrations
    • Running testcases

    Thankfully, Django 1.7 comes with great project defaults like a predefined SQLite 3 database and admin URLs setup, which gives you a running start. Migrations is a real time-saver as you don’t have to keep re-entering your test data.

    The entire recording clocked slightly above 15 mins. Here is the final video and the text version below it:

    Screencast

    People have translated my tutorials into various languages in the past. So I have added subtitles to this screencast. Enjoy the automatic translations in your preferred language!

    Text Version

    Some prefer to read the transcript of the screencast. Assuming you already have Django 1.7 installed in Python 3.4, you can follow these steps.

    1. Start the project
        django-admin startproject qblog
        cd qblog
        ./manage.py migrate
        ./manage.py createsuperuser
        ./manage.py runserver
    
    1. Add an app called blog
        ./manage startapp blog
    
    1. Open blog/models.py and change its contents to:
        from django.db import models
        from django.core.urlresolvers import reverse
    
    
        class EntryQuerySet(models.QuerySet):
            def published(self):
                return self.filter(publish=True)
    
    
        class Entry(models.Model):
            title = models.CharField(max_length=200)
            body = models.TextField()
            slug = models.SlugField(max_length=200, unique=True)
            publish = models.BooleanField(default=False)
            created = models.DateTimeField(auto_now_add=True)
            modified = models.DateTimeField(auto_now=True)
    
            objects = EntryQuerySet.as_manager()
    
            def __str__(self):
                return self.title
    
            class Meta:
                verbose_name = "Blog Entry"
                verbose_name_plural = "Blog Entries"
                ordering = ["-created"]
    
    
    1. In qblog/settings.py add "blog" to INSTALLED_APPS and migrate:
        ./manage.py makemigrations blog
        ./manage.py migrate blog
    
    1. Change blog/admin.py to:
        from django.contrib import admin
        from . import models
    
    
        class EntryAdmin(admin.ModelAdmin):
            list_display = ("title", "created")
            prepopulated_fields = {"slug": ("title",)}
    
        admin.site.register(models.Entry, EntryAdmin)
    
    Go to admin. Add an unpublished post and published one. Then open `./manage shell` and check the difference between `Entry.objects.all()` and `Entry.objects.published()`.
    

    Markdown

    1. Install django-markdown
        pip install django-markdown
    
    1. Add "django_markdown" to INSTALLED_APPS.

    2. Add a second line to qblog/urls.py:

        url(r'^markdown/', include('django_markdown.urls')),
    
    1. Change blog/admin.py to:
        from django_markdown.admin import MarkdownModelAdmin
    
    
        class EntryAdmin(MarkdownModelAdmin):
            ...
    
    Enter test entries now.
    
    Markdown Editor Toolbar Not Showing in Admin?

    Despite this being a Python 3.x tutorial, many have tried this in Python 2.x. Which is great, but the snazzy Markdown Editor in admin seems to be missing for them.

    When I had checked, I found that the Markdown widget's media i.e. javascript and stylesheets were not getting added in admin. A workaround is to explicitly define form_overrides as follows.

      from django_markdown.widgets import AdminMarkdownWidget
      from django.db.models import TextField
    

    class EntryAdmin(MarkdownModelAdmin): list_display = (“title”, “created”) prepopulated_fields = {“slug”: (“title”,)} # Next line is a workaround for Python 2.x formfield_overrides = {TextField: {‘widget’: AdminMarkdownWidget}}

    Index View

    1. Change blog/views.py to:
        from django.views import generic
        from . import models
    
    
        class BlogIndex(generic.ListView):
            queryset = models.Entry.objects.published()
            template_name = "home.html"
            paginate_by = 2
    
    1. Create a url mapping in qblog/urls.py:
        urlpatterns = patterns(
            '',
            url(r'^admin/', include(admin.site.urls)),
            url(r'^markdown/', include('django_markdown.urls')),
            url(r'^', include('blog.urls')),
        )
    
    1. Create blog/urls.py:
        from django.conf.urls import patterns, include, url
        from . import views
    
        urlpatterns = patterns(
            '',
            url(r'^$', views.BlogIndex.as_view(), name="index"),
        )
    

    Index Template

    1. Make template and static directories. Then, copy the files:
        mkdir templates
        cp -R /somewhere/templates/* templates
        mkdir static
        cp -R /somewhere/static/* static
    
    1. Create templates/home.html with:
        {% extends "base.html" %}
        {% load django_markdown %}
    
        {% block blog_entries %}
        {% for object in object_list %}
          <div class="post">
            <h2>{{ object.title }}</h2>
            <p class="meta">{{ object.created }}</p>
            {{ object.body|markdown }}
          </div>
        {% endfor %}
        {% endblock %}
    
    
    1. Add to qblog/settings.py:
        TEMPLATE_DIRS = (os.path.join(BASE_DIR, "templates"), )
        STATICFILES_DIRS = (os.path.join(BASE_DIR, "static"), )
    
    Refresh the home page now. Enjoy the first non-admin page.
    

    Feed

    1. Create blog/feed.py with:
        from django.contrib.syndication.views import Feed
        from blog.models import Entry
    
    
        class LatestPosts(Feed):
            title = "Q Blog"
            link = "/feed/"
            description = "Latest Posts"
    
            def items(self):
                return Entry.objects.published()[:5]
    
    1. Add to blog/urls.py (last but one line):
        from . import views, feed
        
        url(r'^feed/$', feed.LatestPosts(), name="feed"),
    
    
    1. Mention in the templates/base.html template’s HEAD:
        <link href="/feed/" rel="alternate" type="application/rss+xml" title="Q Blog Feed" />


    Entry View

    1. Add to blog/views.py:
        class BlogDetail(generic.DetailView):
            model = models.Entry
            template_name = "post.html"
    
    1. Add to blog/urls.py:
        url(r'^entry/(?P<slug>\S+)$', views.BlogDetail.as_view(), name="entry_detail"),
    
    1. Add to blog/models.py:
        objects = EntryQuerySet.as_manager()
    
        def get_absolute_url(self):
            return reverse("entry_detail", kwargs={"slug": self.slug})
    

    Entry Template

    1. Open templates/home.html and save it as post.html while removing the for loop, like this:
        {% extends "base.html" %}
        {% load django_markdown %}
    
        <div class="post">
          <h2><a href="{% url "entry_detail" slug=object.slug %}">{{ object.title }}</a></h2>
          <p class="meta">
            {{ object.created }} |
            Tagged under {{  object.tags.all|join:", " }}
          </p>
          {{ object.body|markdown }}
        </div>
    
    Update `templates/home.html` with the same `<h2>` line.
    

    Tags

    1. Add tags to blog/models.py:
        class Tag(models.Model):
            slug = models.SlugField(max_length=200, unique=True)
    
            def __str__(self):
                return self.slug
    
    
        class Entry(models.Model):
            ....
            tags = models.ManyToManyField(Tag)
    
    1. Migrate:
        ./manage.py makemigrations blog
        ./manage.py migrate blog
    
    1. Add to blog/admin.py:
        admin.site.register(models.Tag)
    
    1. Change template templates/post.html to:
        <p class="meta">{{ object.created }} |
          Tagged under {{ object.tags.all|join:", " }}
        </p>
    

    Testing

    1. Add these two test cases in blog/tests.py:
        from django.test import TestCase
        from django.contrib.auth import get_user_model
        from .models import Entry
    
    
        class BlogPostTest(TestCase):
    
            def test_create_unpublished(self):
                entry = Entry(title="Title Me", body=" ", publish=False)
                entry.save()
                self.assertEqual(Entry.objects.all().count(), 1)
                self.assertEqual(Entry.objects.published().count(), 0)
                entry.publish = True
                entry.save()
                self.assertEqual(Entry.objects.published().count(), 1)
    
    
        class BlogViewTests(TestCase):
            def test_feed_url(self):
                response = self.client.get('/feed/')
                self.assertIn("xml", response['Content-Type'])
    
    1. Run the tests by ./manage.py test blog and they should both pass.

    Final Notes

    The entire source is available on Github. If you face any issues, make sure that you are running the same Python/Django versions and compare your code with mine.

    As always, I would love to hear your comments and feedback.

    Comments →

    « Newer Page 6 of 39 Older »